LinkedIn has added Trailhead as an education option: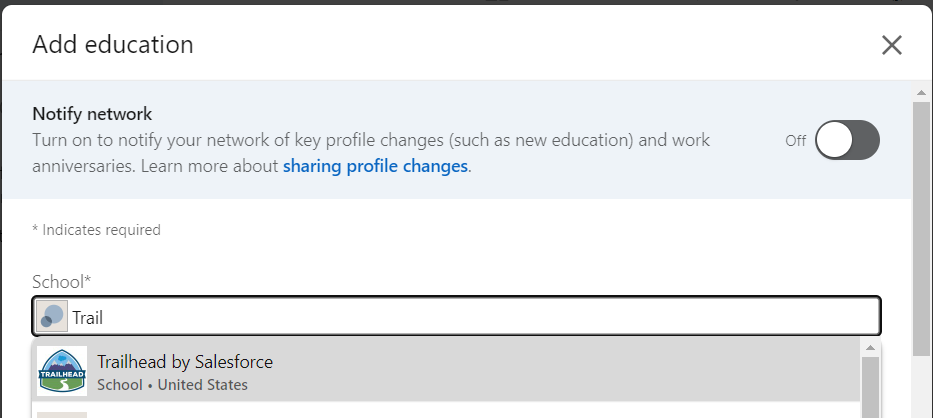
© Scott S. Nelson
After many years as a WebLogic Portal consultant (and a few years delivering WebCenter solutions), I have found a new end-to-end platform that I am passionate about helping people with: Salesforce (dot com).
Follow me for tips on Trailblazers (too) for regular responses to member questions and subscribe to my YouTube channel for curated SF content.

Download it from https://www.logic2020.com/transition-legacy-systems-to-single-target-platform-ebook.

Ah, Spring is in the air. So are arms, as people new to Salesforce throw them up during Trailhead challenges where they can’t seem to get the hands-on part to pass even though they see the result they expect.
The Trailhead modules and Superbadges are so well organized and written, it may seem like there is an instructor reviewing you submissions, but that would not be practical, profitable, or in the spirit of a cloud platform. The scoring is done by automated tests that are checking that things match exactly as the instructions provided.
The most common cause is that the learner has mis-typed a value provided, usually the API name (i.e., my_variable__c). Runner up to this is the experienced user who is new to Trailhead and uses their own naming conventions rather than following the instructions (been there, done that).
The third common cause is that the module content was updated but the test was not (doesn’t happen that often, but you can tell when there are a bunch of questions on the Trailhead Community about the same problem).
Here’s another I often see. Some of the lessons are re-used between modules and trails, or were once in a different order. Regardless of how it got to be, the instructions may say to create a new playground when one has already been created for the module or trail, and work done previously is required to continue.
A couple of similar issues to the above I have also seen is when there are steps described in the lesson content and the challenge assumes these steps were done in the playground. Alternatively, it is sometimes not clear to new Trail Blazers that the same playground should be used throughout a given module or trail, or they inadvertently select to create a new playground or select the wrong playground. Personally, I use a collection of Developer orgs instead of playgrounds to make it easier to go back and find something I had done previously, but I don’t recommend that for most beginners.
This is not an exhaustive list. If you got through it and still haven’t seen Assessment Complete! +500 points, read through the module from the start as if you had never seen it before. Depending on your input processing style, you may want to wait a day or two. Or post a request for help on Trailhead and be sure to include a link to the lesson and module in your request. And feel free to tag @Scott S Nelson.
HTH

Quick summary: How to set up your Salesforce org to listen for webhooks
Setting up your Salesforce org to listen for webhooks should be easy. Actually, it is easy, but it seems the steps are buried in different places like Horcruxes. I’m going to assemble them here, and if He-Who-Must-Not-Be-Named shows up, he can proof-read this for me.
So, we start with a simple Apex class. There are a bunch of examples of this. The easiest one for a quick start is in the Salesforce blog post “Quick Tip – Public RESTful Web Services on Force.com Sites.” Remember, it is a quick demo. Your final code should look like something between that and the example from the Salesforce Apex Hours video “Salesforce Integration using Webhooks.” My example is:
@RestResource(urlMapping='/hookin')
global class MyWebHookListner {
    @HttpGet
    global static String doGet() {
        return 'I am hooked';}
}
Now, the tricky part is that the Quick Tip blog has instructions and a screen shot of “just need to add MyService to the Enabled Apex Classes in the Site’s Public Access Settings,” followed by a wonderful example of a sample URL. Because I used Sites and Domains customizations once for a Trailhead exercise six years ago, the connection did not immediately click for me, nor the other steps. I will save you the tedium of reading all that I went through, which included pausing the aforementioned video several times to capture the exact steps and summarize them for you here.
In Setup, search for “site” and select User Interface > Sites and Domains > Sites from the results. Create a site here if you don’t already have one (and if it is in production, make sure it is the URL you want).

If you created the domain just now, scroll down after clicking the Register My Salesforce Site Domain button and click the New button at the bottom. Fill in only the required fields (remember, this post title starts with “Quick and simple,” not “Safe and secure” … though you should do that on your own until I write that version), and Save (there may be a delay before the screen refreshes … be patient, as clicking it again will cause it to try to create another site and give you an error message). If you already had a site, click the site name in the list at the bottom of the page to get to Site Details page, specifically, the Public Access Settings button.
Here we want to find the Enabled Apex Class Access link and click it or the Edit button that pops up on hover:

And finally we get to the screen shown in the Salesforce blog post that lets the magic happen:

Add your class, save, and you may need to navigate again to the bottom of the Sites page and click the Activate button to activate the site you have created.
Now, take the site URL and add services/apexrest/[urlmapping] (the value used in you Apex code for urlMapping=) and go there. (The full URL will look something like “https://my-developer-edition.na9.force.com/services/apexrest/myservice,” with the bold text matching your site address and urlMapping, respectively.)
If all went well, you should see what ever nifty response you set as a return string, at which point you can get rid of the return string and do the serious stuff you want to do with your webhook. If not, drop me a line describing exactly what happened and I’ll try to figure out which of us skipped a step.
Also, for that security stuff I had said I wouldn’t cover, I do have to recommend that you:
Again, there may be more details in a future post. This one was just to make sure I didn’t have to go on another Horcrux quest.
To summarize all of above cheekiness into a set of steps:
Originally published at Logic20/20 Insight
While the Salesforce Winter ’21 Release Notes mention:
NOTE Email Template Builder isn’t available for previously created Classic and Lightning email templates.
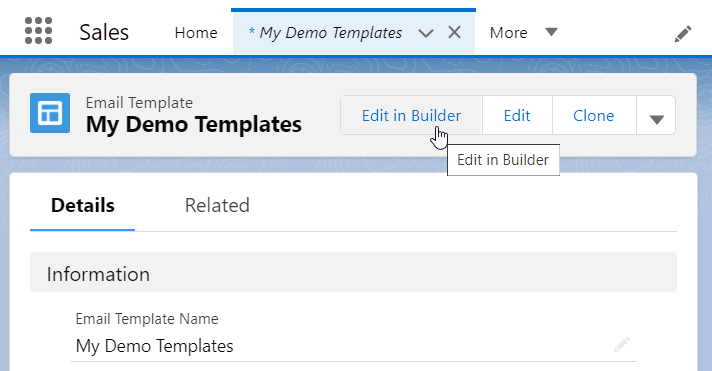
What I did not expect is that it doesn’t matter so much that the template was created before the release, but that the creator of the template had been granted the Access Drag-and-Drop Content Builder System Permission (per Select Who Can Work in Email Template Builder) before creating the template.
How did I discover this? I created a template as a System Administrator and did not see the Edit in Builder button. I then created a permission set and added it to my profile. Still not there. I then spent a lot of time trying different browsers and turning the permission off and on again, all to no avail. Then I created another template and, voilà! there was the button.
I am either the only one dumb enough to perform the steps in this particular sequence or brave enough to admit it, as part of the time spent figuring it out was searching Trailblazers and https://salesforce.stackexchange.com for answers or even similar problems.