One of my rare posts on my employer’s site: Taming Complex Cloud Integrations with Informatica Cloud | Primitive Logic
© Scott S. Nelson
One of my rare posts on my employer’s site: Taming Complex Cloud Integrations with Informatica Cloud | Primitive Logic
One type of mapping I find particularly complicated to build is one using the SAP iDoc connector. The complicate part is achieving the correct value nesting. It is complicated because when you create the mapping, the nesting is not visible. It is created by the use of Primary and Foreign key fields (GPK and GFK in the mapplet).
I have seen several approaches to this that work and the approach I am going to share here is the one that I came up with and use because I understand it. YMMV.
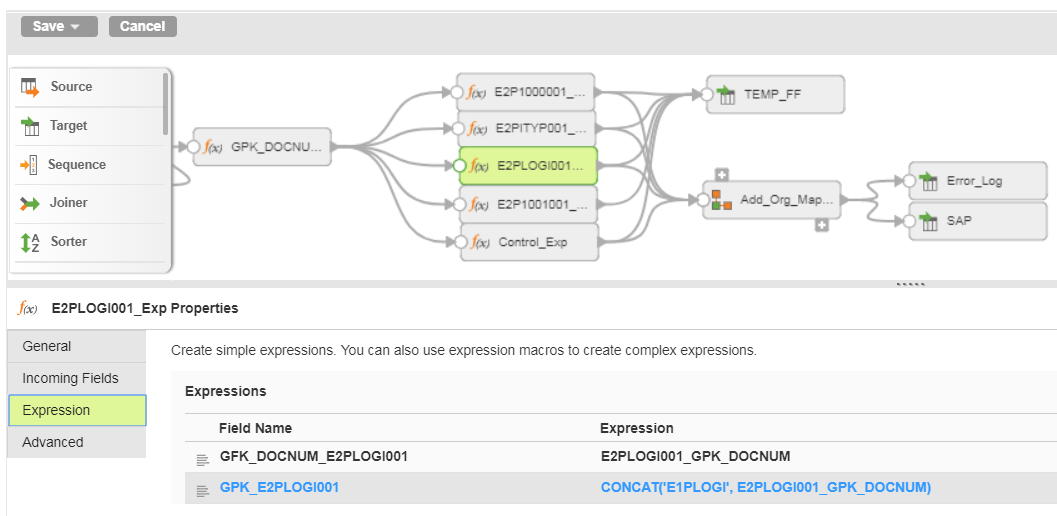
First, I create a list of GPK and GFKs from the mapplet XML. These values can be found in the TRANFORMATION nodes within the MAPPLET node.
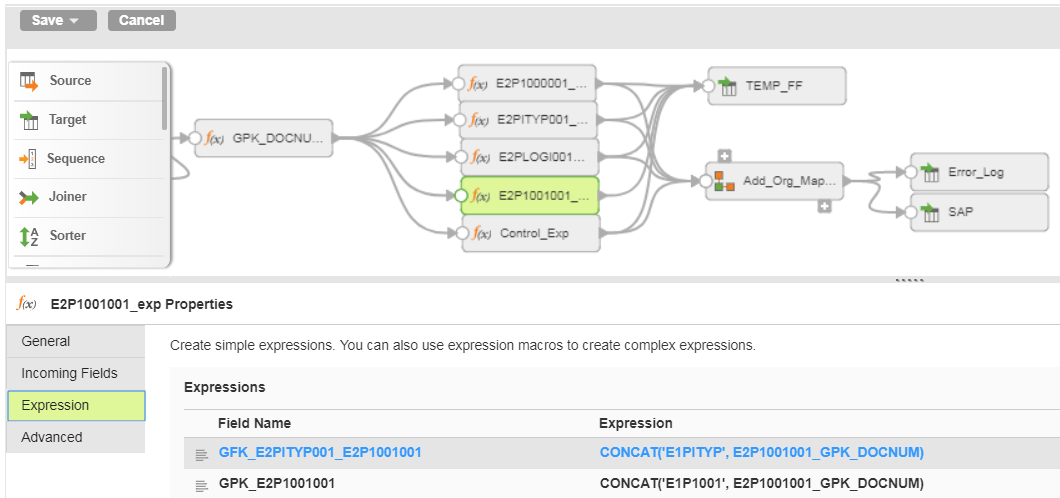
With this list in hand, I create the document GPK with a field that will be unique per iDoc. In this case I have a unique entity ID in my source and a date field that will make the entry for the entity unique. I prefix this key with the OTYPE because I may have multiple entries for the same object on the same date but different OTYPEs.

Then, for each immediate child, I define its GFK and GPK using the node names as prefixes:
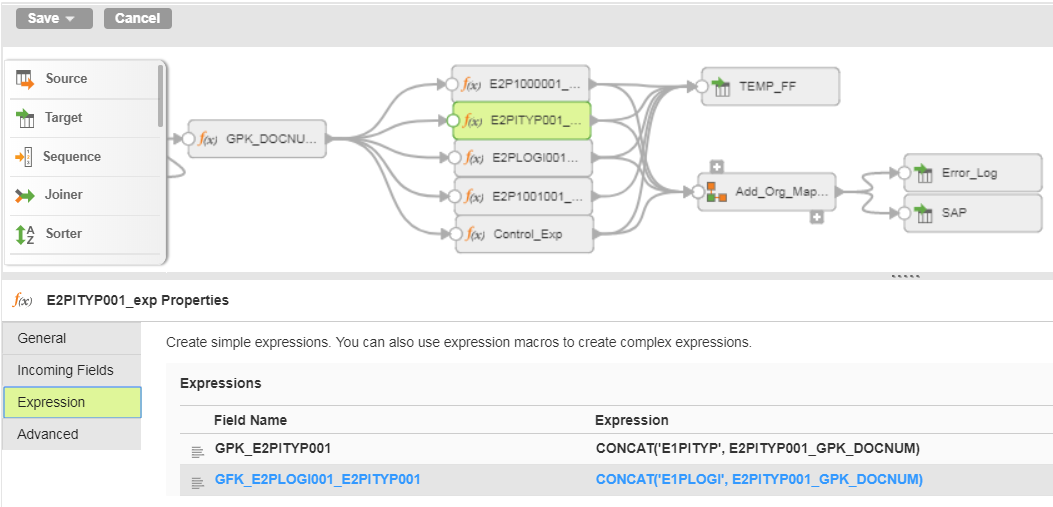
The above examples goes three levels deep. If your iDoc requires nest your nodes in a different pattern, generate your GPK values in such as way that they can be properly created in both the parent and child node.
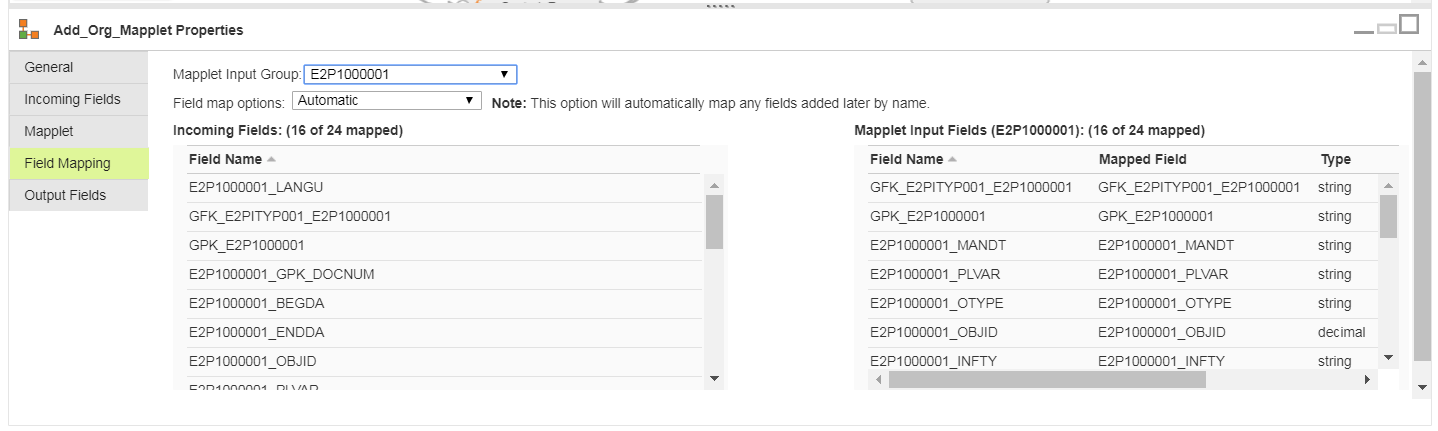
For ease of maintenance, I name the fields in the expressions the same as they are defined in the mapplet so that I can use Automatic field mapping, which is eliminates the need to manually re-map anytime I make a change:
I hope this saves you some of the time it took to get me to this approach.
Ran into this recently and wanted to share it with my loyal reader… An Informatica Cloud Application Integration solution that worked wonderfully through months of UAT and flawlessly the first few weeks in production suddenly produced complaints from stake holders because the files output as the end result of the process were empty.
Looking at the process logs, there were no errors shown. Every technologist’s favorite finding (sarcasm, for those not blooded in debugging production issues).
The application functionality is relatively simple: Listen for new files in a remote folder via SFTP, download the files and rename them for processing by a Data Integration Mapping Configuration Task then run the MCT. I’ll spare you the details of trying to get the details of the missing files except that once they were obtained the pattern I noticed was that the missing files were the largest in the brief history of the application. Not much more deduction required to figure out that in the source environment the files were being written directly to the outgoing folder rather than being created elsewhere and dropped in when complete. The larger files took longer to write than the polling interval so they were being brought down in name only (pun intended).
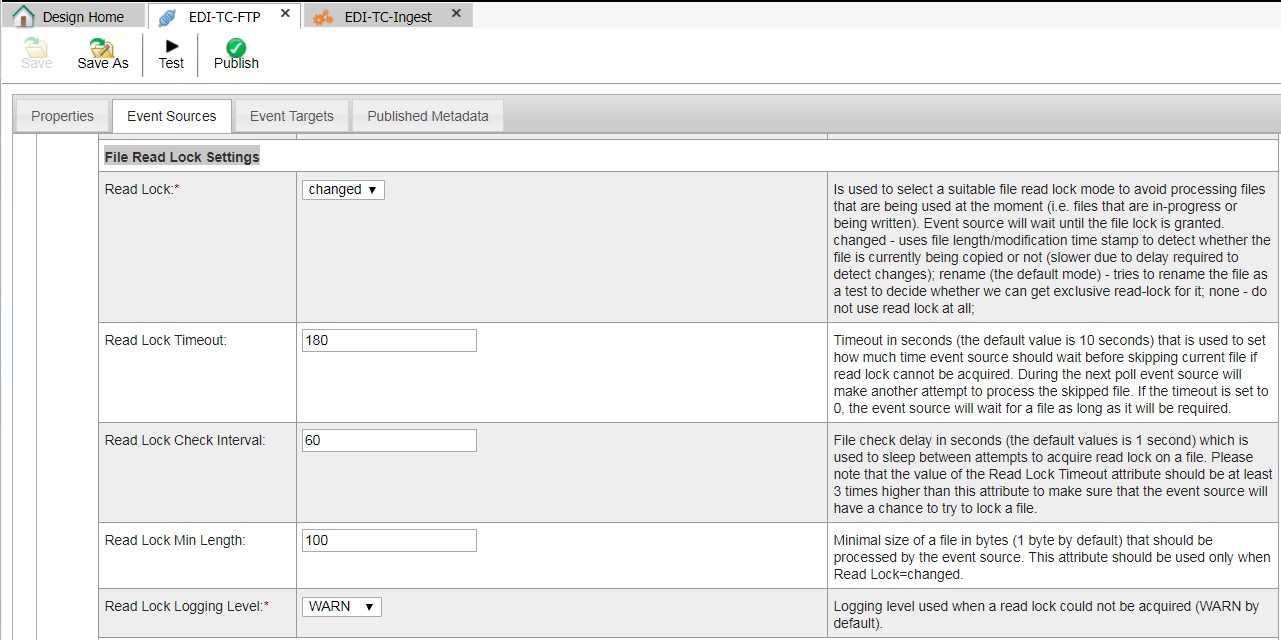
It took a while of reading and re-reading the documentation for the FTP connector to determine that the best strategy for this issue was to use the File Read Lock Settings for the event source, setting the Read Lock value to “changed” and running tests to the get the correct values for the other File Read Lock Settings.
Problem solved!
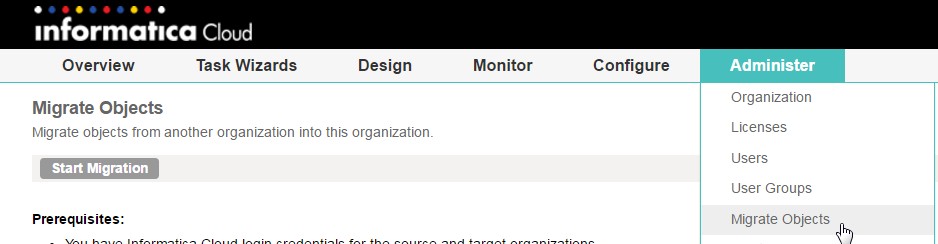
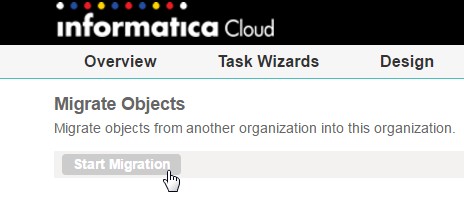
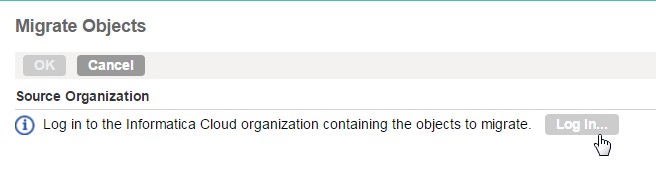
Screenshots with captions:
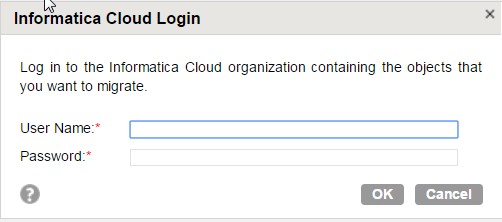
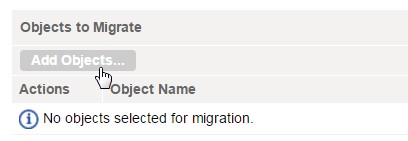

Save time by selecting objects at the top of related hierarchies, such as Task Flows will automatically select the tasks, and any objects required to support the task (such as Mappings and Connections) where selecting an items lower in the hierarchy (such as Connections) will not automatically select their parents. Close the dialog by clicking the OK button (not pictured).
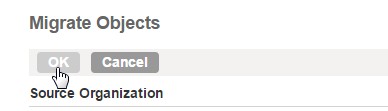
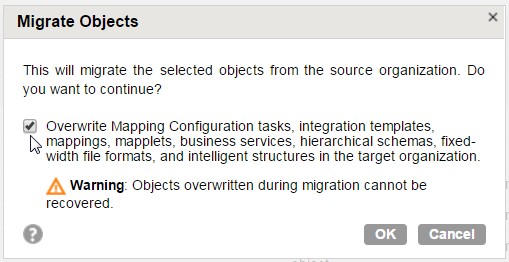
If you are migrating updated objects you will see the prompt above. You may wish to rename the existing objects before migrating. You may also want to delete the existing objects as the Overwrite behavior may not be what you expect.
Once the migration is complete, you will need to review your objects to confirm or correct any Org-specific values such as the Secure Agent name or credentials for Connections that require them.
I am going to start this article with a confession. As a system integration and automation consultant I am continuously shifting from one product, language and platform to another. The frequent changes strengthen the short-term memory and change the long-term memory to manage concepts more than details. A complex set of steps, processes or systems commands that can be performed without having to refer to Google, Evernote, or vendor documentation today can often fade to nothing more than a clear memory of having done them without recall of the specifics within a few months. Sometimes in mere weeks (or even days) depending on how different the next project is. So the main reason I write these detailed articles is so that I can repeat a process if ever needed again. Being able to share these mental breadcrumbs is just a bonus.
Lately I have been working a great deal with Informatica Cloud, an excellent iPaaS solution. Informatica Cloud uses an on-premises application called a Secure Agent to facilitate secure interactions between internal systems and the Cloud. During training and development it is useful to have a Secure Agent running on a developer’s laptop. While the Secure Agent will install on the operating systems of most laptops, it runs better in an environment that is configured to support server operations rather than day-to-day work. There is also a simple way to switch the Informatica Cloud instance (known as an Org), though it can be a hassle for a developer or consultant that needs to interact with multiple Orgs. To make life easier in such circumstances, I have taken a baseline VirtualBox image and added some applications and scripts so that the image can be quickly configured for any Org I have access to. Following are the steps I took to build this image, plus instructions for running the scripts that will make it reusable.
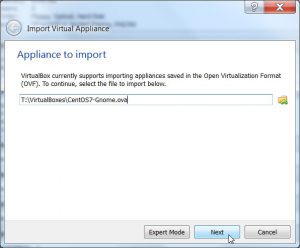
If you aren’t familiar with VirtualBox, you can download it for free at https://www.virtualbox.org/wiki/Downloads. Be sure to get the Guest Additions download, too, you will want it later. I don’t have a preference for a specific Linux distribution. This article uses a CentOS 7.0 image available from https://s3-eu-west-1.amazonaws.com/virtualboxes.org/CentOS7-Gnome.ova.torrent, a choice resulting from the first image found that was of recent vintage and provided sufficient support for the task (it also has a graphical desktop, which is useful when you want to share the image with people who may not be comfortable with command-line-only interfaces). That said, support for various installation processes vary widely between distributions and builds, so if you choose a different distro you may need to find alternative methods to some of the steps on your own.
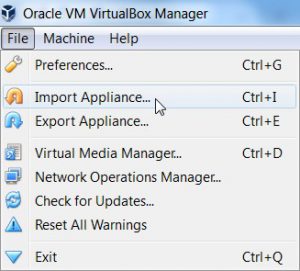
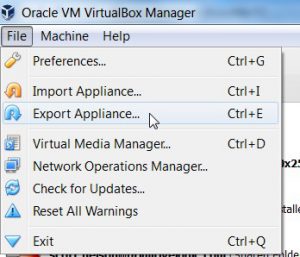
The first step is to import the pre-built appliance you have downloaded. The screenshots below will help if you have never done this before.
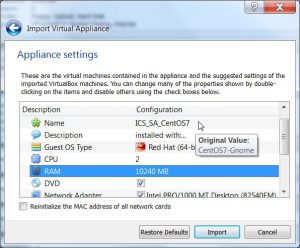
I change the Name of the appliance to be descriptive of the purpose of the image after I have completed configuring it. I also increase the CPU count and RAM total so that it will not be too slow during development test runs. You may need to adjust these values according to your own machine. I recommend no more than half of your available resources.
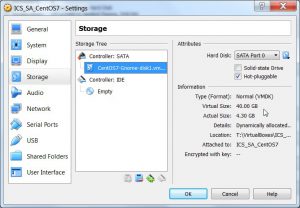
One reason I use this particular base image is that it has adequate hard drive space, which many lack. If you have an appliance image you like but the drive space is too small, see my blog post about Resizing the Root Drive on a Linux VirtualBox Guest Image with a Windows Host for a solution to use it anyway.
One value of a VM is the ability to use Snapshots to go back to a working point. During the process we will create one to make a reusable appliance. Create others as you go according to your own sense of adventure or caution. I suggest you delete old snapshots when you know your current state is stable to save disk space. Doing so at the start saves re-importing the appliance if there is a mis-step earlier in the process.
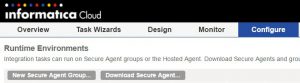
The next thing to do is to install the Secure Agent. If you plan to re-use this image as a starting point, do not initialize the agent after installation, just start it and verify the install as follows (screen shots follow the steps for those unfamiliar with them):
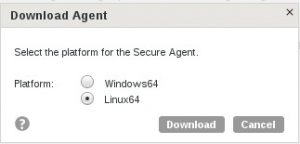
Download the agent from Informatica Cloud
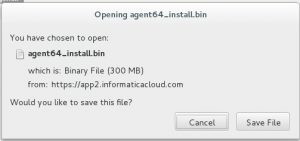
then:
[centos@localhost ics]$ cd ~/Downloads
[centos@localhost Downloads]$ chmod +x agent64_install.bin
[centos@localhost Downloads]$ ./agent64_install.bin
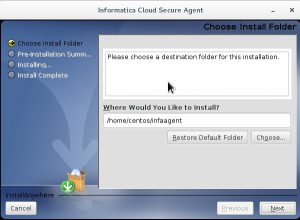
Choosing the default install location is the simplest option.
[centos@localhost Downloads]$ cd ~/infaagent
[centos@localhost infaagent]$ ./infaagent startup
[centos@localhost infaagent]$ cd main/agentcore
[centos@localhost agentcore]$ ./consoleAgentManager.sh getstatus
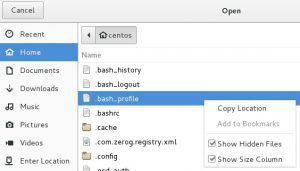
Finally, add the following to ~/.bash_profile:
cd ~/infaagent/
./infaagent startup
For this to be reusable, we will want to change the hostname, especially for a shared dev environment as we cannot have everyone using “localhost” as their hostname. The following is a bit of an overkill script that handles setting the hostname for a variety of distributions:
changehostname.sh:
#!/usr/bin/env bash

OLD_HOSTNAME="$( hostname )"
NEW_HOSTNAME="$1"

if [ -z "$NEW_HOSTNAME" ]; then
 echo -n "Please enter new hostname: "
 read NEW_HOSTNAME < /dev/tty
fi

if [ -z "$NEW_HOSTNAME" ]; then
 echo "Error: no hostname entered. Exiting."
 exit 1
fi

hostnamectl set-hostname "$NEW_HOSTNAME"
hostnamectl set-hostname "$NEW_HOSTNAME" --pretty
hostnamectl set-hostname "$NEW_HOSTNAME" --static
hostnamectl set-hostname "$NEW_HOSTNAME" --transient

echo "Changing hostname from $OLD_HOSTNAME to $NEW_HOSTNAME..."

hostname "$NEW_HOSTNAME"

if [ -n "$( grep "$OLD_HOSTNAME" /etc/sysconfig/network )" ]; then
 sed -i "s/HOSTNAME=.*/HOSTNAME=$NEW_HOSTNAME/g" /etc/sysconfig/network
else
 echo -e "HOSTNAME=$NEW_HOSTNAME" >> /etc/sysconfig/network
fi

if [ -n "$( grep "$OLD_HOSTNAME" /etc/hosts )" ]; then
 sed -i "s/$OLD_HOSTNAME/$NEW_HOSTNAME/g" /etc/hosts
else
 echo -e "$( hostname -I | awk '{ print $1 }' )\t$NEW_HOSTNAME" >> /etc/hosts
fi

echo "Re-boot for change to reflect correctly."
This is also a good time to place a readme on the desktop. Here is the one I use:
###### One time set up #######
Open a terminal and execute the folloiwng commands (excluding [examples])

cd ~/infaagent
sudo su
./changehostname.sh PL_USER_ID

[example:./changehostname.sh scott.nelson]

exit

Restart the VM

cd ~/infaagent/main/agentcore
./consoleAgentManager.sh configure USERNAME PASSWORD

[example:./consoleAgentManager.sh configure linux.virtualbox@primitivelogic.com pa55w0rd]


[LEAVE TERMINAL WINDOW OPEN]

Log in to Informatica Cloud with the same credentials registered above, go to Configure > Runtime Environments

Confirm that the PL_USER_ID agent has been created
wait for upgrade to complete (at least 10 minutes)
return to terminal and run:

reboot

Log in and should be good to go.

#################################
If you have questions: theitsolutionist@gmail.com

Useful commands:

cd ~/infaagent
./infaagent shutdown?
./infaagent startup?

cd ~/infaagent/main/agentcore
./consoleAgentManager.sh getstatus
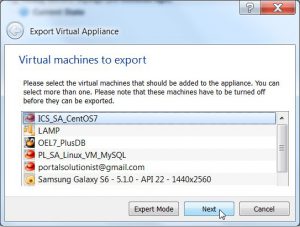
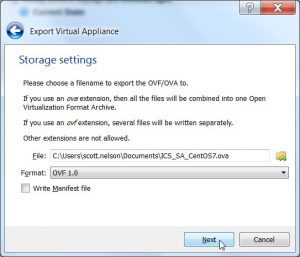
Save the script in ~/infaagent, shut down the virtual machine and create a snapshot. Then start the machine and follow the readme. If all works well, restore the last snapshot and then export the appliance as your base image.
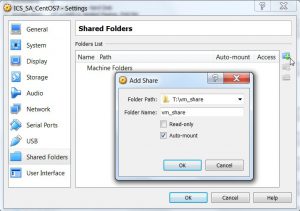
I set up a shared folder to easily exchange files between the guest (Virtual Machine) and host (laptop), as well as to have a place to uses as a file location accessible to both while working with Informatica Cloud flat file connections and logs.
In order to access the shared folder (as well as have a shared clipboard), run the Guest Additions set up after logging in to the new VM.
CentOS7 is not all that easy to do that with. There is a good set of instructions at http://lifeofageekadmin.com/how-to-install-virtualbox-5-additions-on-centos-7/. One thing that is not clear in the instructions is that you will want to shut down and re-start the VM after the last yum update before running the Guest Additions installation. You may also have to run it twice to get everything working.
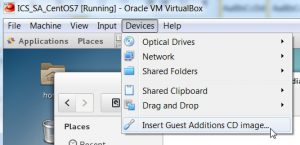
You will probably need to use Right-CTRL+C to release your mouse from the VM until the Guest Additions are installed.
Once the shared folder shows up under /media, add the centos user to the group for access:
sudo usermod -a -G vboxsf centos
Restart for change to take effect.
I often find that MySQL is handy to have on the VM. The following steps will work to get it installed on the CentOS 7.0 image available from https://s3-eu-west-1.amazonaws.com/virtualboxes.org/CentOS7-Gnome.ova.torrent.
First, remove the old install with
sudo yum -y remove mariadb-libs
Then download the latest install from https://dev.mysql.com/downloads/repo/yum/.
The Red Hat Enterprise Linux 7 version seems to work on Centos 7. Save the download rather than opening it, then go to your downloads folder and run the following commands:
sudo yum -y localinstall platform-and-version-specific-package-name.rpm
sudo yum -y install mysql-community-server
sudo service mysqld start
When done, verify with
sudo service mysqld status
Finally, find and update the database admin password and (optionally) install Workbench using:
grep 'temporary password' /var/log/mysqld.log
...
mysql_secure_installation
...
sudo yum -y install mysql-workbench-community
Be sure to add the new password to your readme.