(Originally published at Logic 20/20 as SFDX, VSCode, and deploying from a package the editors stripped out all of the links, rendering it an entirely different post. This is the original version.)
While I do not immediately dislike new tools, I do struggle with adopting them when I find nothing wrong with the old ones. And then I delay learning them until I’m forced to, which is the case of Visual Studio code for Salesforce (they are no longer supporting the Eclipse IDE and abandoned the DX extension for Eclipse before DX went GA) and Git (because that is the way the dev world has gone). I find the best way to learn new tools is to write about how to learn them, so here we go.
(In the spirit of working in a low code platform, we will also see how much of this I can do with just links to existing documentation…)
If you haven’t already, Install Salesforce Extensions for VS Code.
Then Enable Dev Hub in Your Org and Enable Second-Generation Packaging (note that while 2GP is beta as of this writing, this is required to enable first generation Unlocked Packages which is GA).
Next…Well, that didn’t take long. I cannot find a stand-alone URL for creating an SFDX project, so I’m going to steal a section from a Trailhead lesson (because it is as much typing to say what not to do as it is to re-create it here):
- Open VS Code.
- From the menu, select View | Command Palette.
- In the command palette search box, enter [PROJECT_NAME].
- Select SFDX: Create Project.
- Use the same name as your GitHub repo, then click Enter.
- Click Create Project.
- Create a .gitignore file to ignore hidden directories:
- Hover over the title bar for the DX project. then click the New File icon.
- Enter .gitignore. [check if it already exists and just edit if so]
- In the text editor, indicate to ignore these two hidden files:
.sfdx
.vscode
To foster good habits, I will set up a github repo to store this project in (though following a full lifecycle will be another article) by following the excellent documentation at https://help.github.com/en/github/importing-your-projects-to-github/adding-an-existing-project-to-github-using-the-command-line and add the project to the repository.
Now go do some work in Salesforce. For example purposes, let’s do the Build a Simple Flow project.
After you complete the project, follow the instructions to Create and Upload an Unmanaged Package, skipping the Upload part. I named the project TH_Flow_Project, which you don’t have to, I only mention that as I will use that text in the example commands.
Salesforce provides a nice reference to Create a Salesforce DX Project from Existing Source. I have some additional thinking around how to go about this part, so I will end the approach of linking to references and switch to my own approach. If you followed the last link and stopped here, you won’t learn anymore about the Salesforce DX capabilities, but you may miss out on some of my shortcuts and wit. With that said…
Authorize the org you created the flow in with the following:
sfdx force:auth:web:login –setalias <MY_SOURCE_ALIAS> –instanceurl <MY_ SOURCE_ORG_URL>
Example:
sfdx force:auth:web:login --setalias TH-ORG02 --instanceurl https://infa-ca-wav-dev-ed.my.salesforce.com/
A bit late to mention, but if you are using a Developer org, I highly recommend to Set Up My Domain. Trailhead orgs already have one. If you haven’t, you can probably leave off the instanceurl parameter and it should pick it up from the default configuration for your project (YMMV). Otherwise use the URL that you login to your org with.
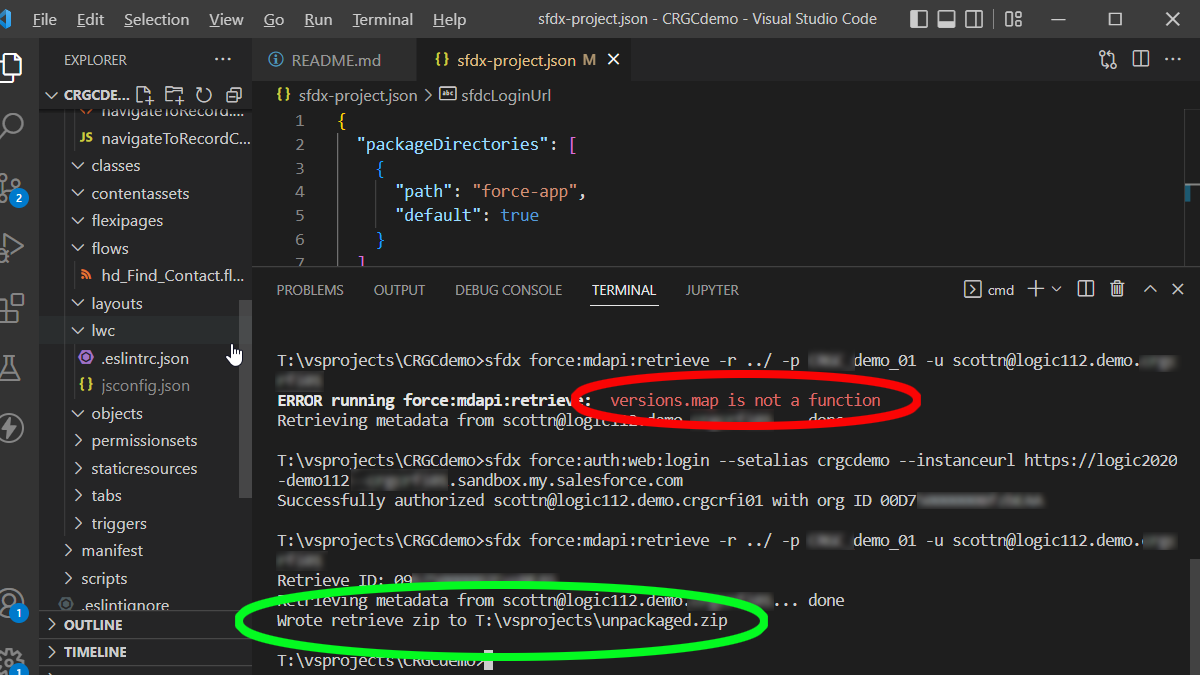
Next, download the package using the following:
sfdx force:mdapi:retrieve -r ../ -p <PACKAGE_NAME> -u <USERNAME>, ex:
sfdx force:mdapi:retrieve -r ../ -p TH_Flow_Project -u scott@trailh2.org
Let’s break that down just a bit. The first part is the base command to retrieve (sfdx force:mdapi:retrieve). The -r parameter determines where the downloaded zip file will be located. The example uses a relative path indicating the folder above the DX project. As a best practice, I recommend always staying in the project directory inside the VSC terminal, with all commands base on being relative to that location. This way you can maintain a list of commonly-used commands that will be re-usable across all projects. The downloaded file name is always unpackaged.zip.
The files need to be unzipped before they can be used (someone should make a feature request for the convert command to work on zip files instead of having to unpack them first). In Linux the relative command is:
unzip ../unpackaged.zip -d ../
Now we add the files from the package to our project using the relative path command:
sfdx force:mdapi:convert -r <PATH_TO_UNZIPPED_PACKAGE> -d <PATH_TO_[/force-app]>, ex:
sfdx force:mdapi:convert -r ../TH_Flow_Project -d force-app
Now all of the files from your package are part of your project.
To add this to your target org, first authorize that org as done previously for the source org, i.e.:
sfdx force:auth:web:login –setalias <MY_TARGET_ALIAS> –instanceurl <MY_ TARGET_ORG_URL>
Example:
sfdx force:auth:web:login --setalias TH-ORG02 --instanceurl https://infa-ca-wav-dev-ed.my.salesforce.com/
And (almost) finally, deploy the updates from your project to the target org with:
sfdx force:source:deploy -u <TARGET_USERNAME> -x <PATH-TO-PACKAGE.XML>
sfdx force:source:deploy -u apex@theitsolutionist.com -x ../TH_Flow_Project/package.xml
(Another feature recommendation is to have an alias option instead of only the username.)
And finally (this time for real!) look in your list of flows to see the flow installed in your target org.
Of course, you are doing this with a throw-away org, right? Because I forgot to mention that deploying will over-write any existing components with the same name.
One final note. We used the package.xml from the downloaded package for the sake of simplicity. Once the package import is validated, you will want to combine the package.xml from the download with the package.xml in your project located in the manifest folder of your project.
The project created from the writing of this article can be found at https://github.com/ssnsolutionist/trailhead1
If you found this interesting, please share.
© Scott S. Nelson