Everyone agrees that self-signed and demo certificates for SSL and HTTPS should never be used in production and preferred not to be used elsewhere. Most self-signed and demo certificates are provided by vendors with the intention that they are used only to integrate within the same environment. In a vendor’s perfect world all application servers in a given enterprise are from the same vendor, which makes this lack of interoperability in a non-production environment an advantage. For us working in the real world, where not only do we not use a single vendor everywhere but have to make do with self-signed certificates for all but production, testing HTTPS between an IIS ASP.NET service provider and a WebLogic J2EE consumer application can be very frustrating to set up. It was for me, especially having found many blogs and discussion threads where various solutions were described but did not quite work and were all mostly similar but just a little bit different. To save both you and my future (who always seems to forget the hardest-won lessons) all of the pain and suffering, I am recording the steps that finally worked here for reference and sanity.
How You Know You Need This
The first cold clutches of dread that tells you it is going to be a long day is when you attempt to a WSDL published by IIS in WebLogic over HTTPS and you see the following:
<Jul 30, 2012 2:51:31 PM EDT> <Warning> <Security> <BEA-090477> <Certificate chain received from myserver.mydomain.com – 10.555.55.123 was not trusted causing SSL handshake failure.>
weblogic.wsee.wsdl.WsdlException: Failed to read wsdl file from url due to — javax.net.ssl.SSLKeyException: [Security:090477]Certificate chain received from myserver02.mydomain.com – 10.555.55.123 was not trusted causing SSL handshake failure.
The above is what started a three day sojourn into searching for a solution. Even people who had solved it before would tell me how they did, and then shrug when I demonstrated that the steps did not end in the success they claimed I would experience. Rather than torture you with the details of everything I did that did not work, here is what finally did work.
Export the Certificates from IE
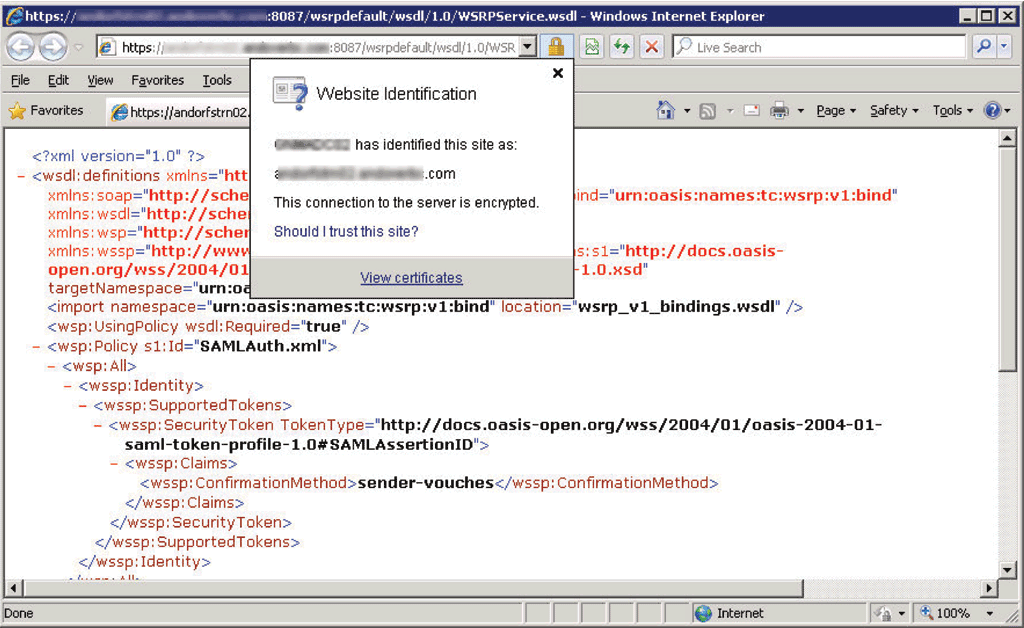
First, take the offending WSDL URL and paste it into IE (if you have an internal Microsoft CA, you have IE, even if you don’t use it in favor of some other browser). To state the semi-obvious, if you received the error above there is a certificate configured for the IIS host of the service and the SSL port has been configured properly. Otherwise there would be a different error, usually about the site not found or connection failed.
Once the WSDL loads, to the right of the address bar there will be a lock icon. Click the lock and then click View Certificates in the resulting dialog (if you do not have a lock icon but do have a Certificate Error message, see http://support.microsoft.com/kb/931850 for steps to install the certificate then you can continue from the point of finding the lock icon).
Next, select the Details tab in the resulting dialog
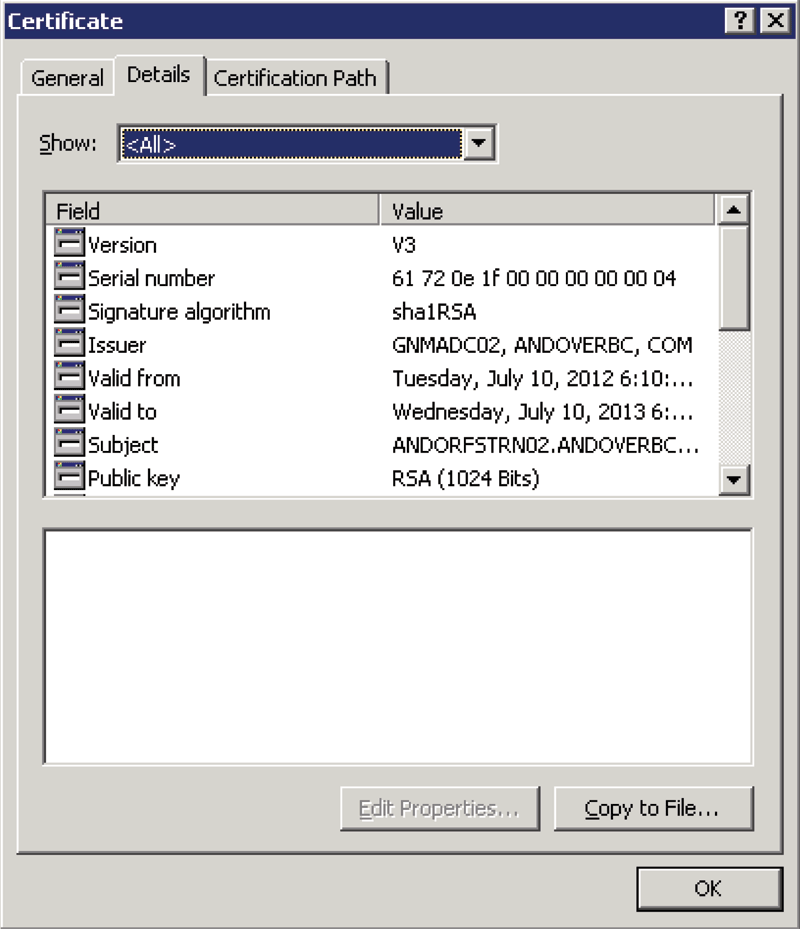
Figure 2: Use Certificate Details to Export Certificate
Click Copy to File, then Next, then select the Base-64 encoded option for the format
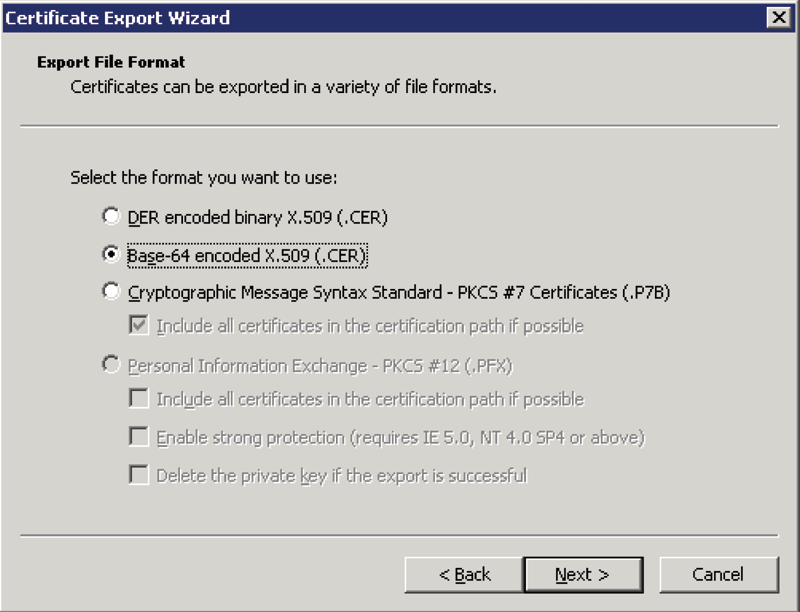
Figure 3: Select the Base-64 encoded option for the format
For the sake of simplicity, I choose to save this to the root of the WebLogic domain. It will work from anywhere, but later you will need to type in the full path rather than just the certificate name if you save it elsewhere.
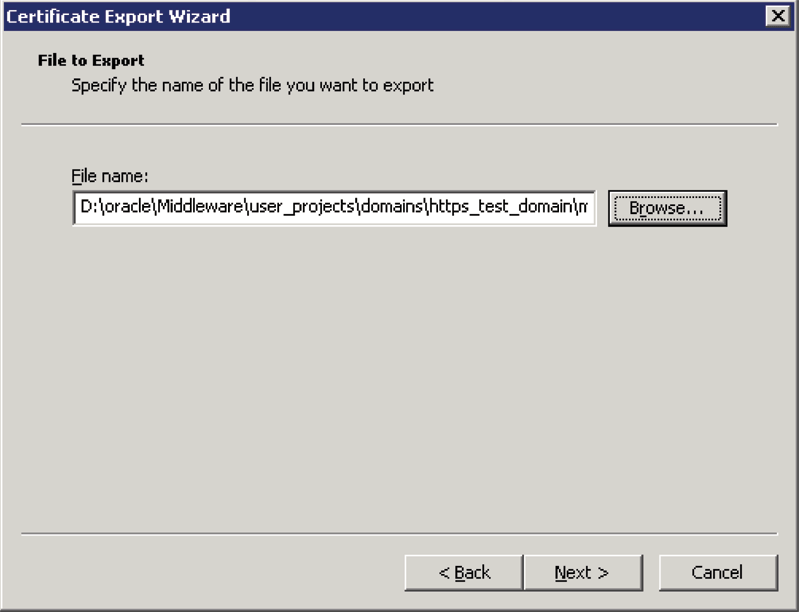
Figure 4: Browse to Save Location
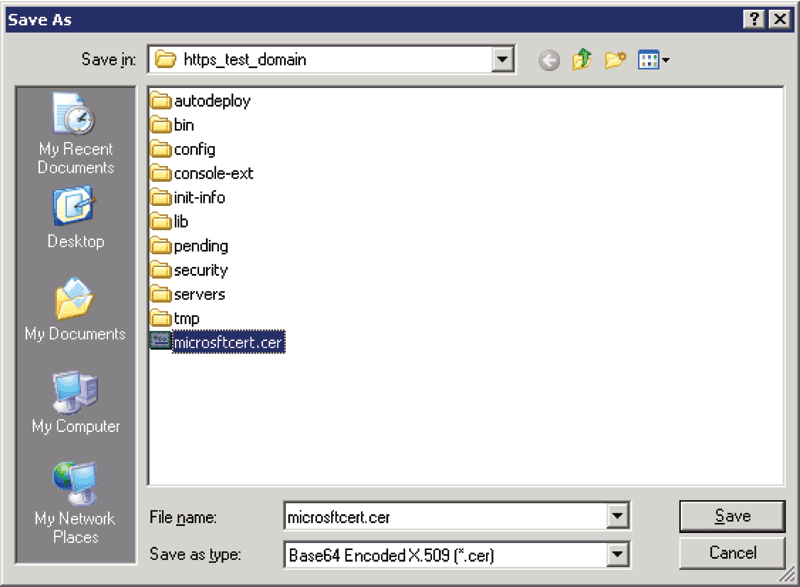
Figure 5: Save the Certificate to the Domain Root for Convenience
This is the point where I ran into some confusion. Some articles mentioned exporting the entire chain of certificates. This supposedly works for some types of certificates, or if you have a few other tools and the time to learn them. For the SSL experts out there, they already have these tools, know how to use them well, and should not be wasting their time reading this article meant for folks who just want to get things wired up and back to unit testing and development. For the rest of us, the easiest way to make sure things will work is to just export all the links in the chain individually and let WebLogic Server worry about re-assembling them into a chain (which it does quite nicely). While perhaps not the most elegant solution, the multi-step process is easy to repeat and uses only tools that are immediately available and require no learning curve. So…
Next, go to Tools then Internet Options then the Content tab and click Certificates. Go to the Trust Root Certificate Authorities tab and find the certificate root for your Microsoft CA cert (look for the Issuer of the certificate you exported earlier).
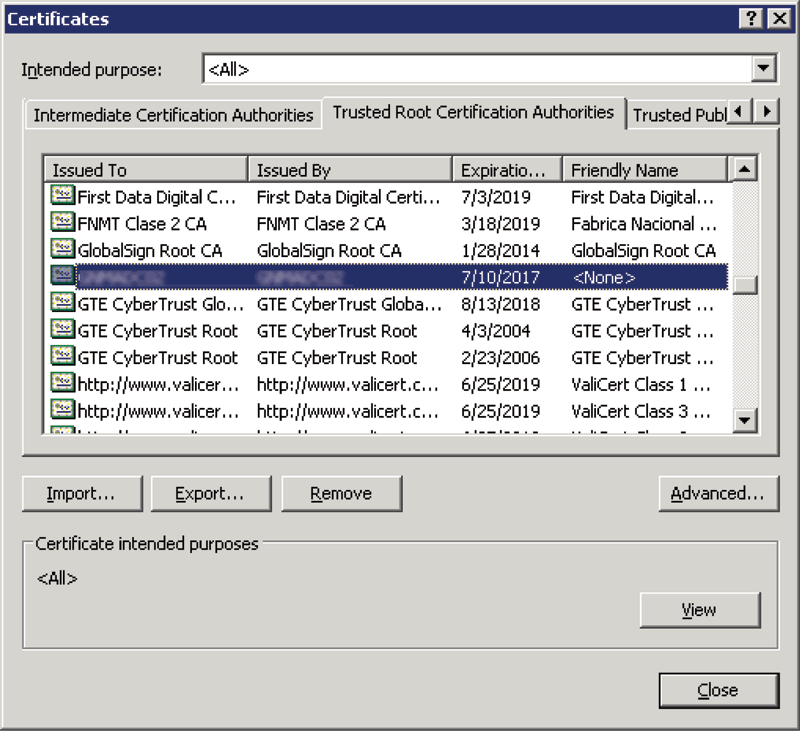
Figure 6: Trusted Root Certification Authorities Tab
Export this one the same way as before, with a different name
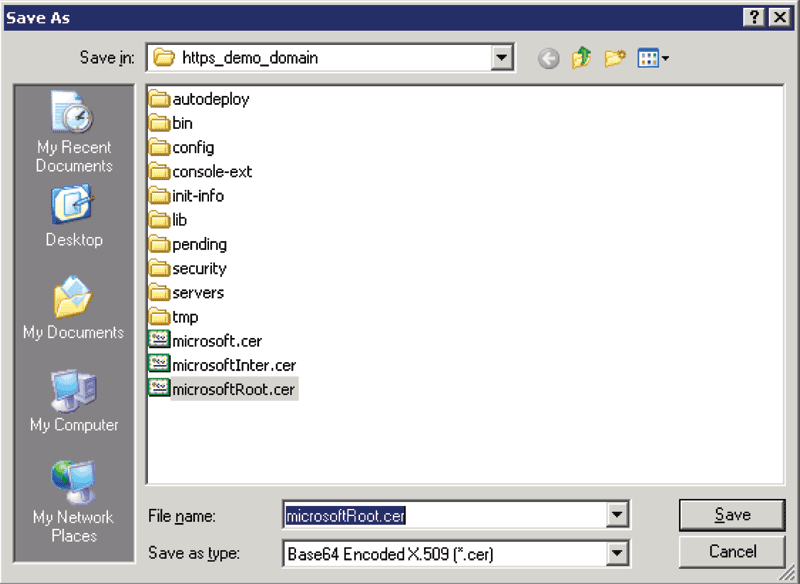
Figure 7: Use a Unique Name for Each Certificate
Repeat this once more for the Intermediate Certificate tab.
Import the Certificates to the WebLogic Domain
Now, open an command prompt, navigate to [WEBLOGIC_DOMAIN_ROOT]bin and execute setDomainEnv. You should then be in the root of the domain. If not, CD to the domain root.
Assuming you saved the certificate in the domain root, execute the following:
keytool -importcert -alias [ALIAS-1] -trustcacerts -file [FULL PATH TO .CER 1] -keystore truststore.jks -storepass [PASSWORD]
An example with the variables filled in is:
keytool -importcert -alias IIS-1 -trustcacerts -file microsftcert.cer -keystore truststore.jks -storepass password
After several lines out output you will be prompted with:
Trust this certificate? [no]:
The correct answer is ‘yes’ (minus the quotes, of course). You’ll you know you were successful if the response is:
Certificate was added to keystore
If not, check your typing, as that is generally the source of an error at this point.
Repeat this for all three of the certificates you exported, changing the [ALIAS-1] and [FULL PATH TO .CER 1] value each time. For example:
keytool -importcert -alias IIS-1 -trustcacerts -file microsftcert.cer -keystore truststore.jks -storepass password
keytool -importcert -alias IIS-2 -trustcacerts -file microsftcertRoot.cer -keystore truststore.jks -storepass password
keytool -importcert -alias IIS-3 -trustcacerts -file microsftcertIntermediate.cer -keystore truststore.jks -storepass password
In the above we created a new JKS key store. You can re-use an existing one by changing the name of the JKS file to one you already have and change the password to the one that matches that JKS file. For the DemoTrust.jks that is included with WebLogic the password is DemoTrustKeyStorePassPhrase. An example here would be:
keytool -importcert -alias IIS-1 -trustcacerts -file microsoft.cer -keystore DemoTrust.jks -storepass DemoTrustKeyStorePassPhrase
keytool -importcert -alias IIS-2 -trustcacerts -file microsoftRoot.cer -keystore DemoTrust.jks -storepass DemoTrustKeyStorePassPhrase
keytool -importcert -alias IIS-2 -trustcacerts -file microsoftInter.cer -keystore DemoTrust.jks -storepass DemoTrustKeyStorePassPhrase
Whichever keystore you use, you can check your work with:
keytool -list -keystore truststore.jks -storepass password
Where “truststore.jks” and “password” can be replaced appropriately if necessary. The output will look something like this:
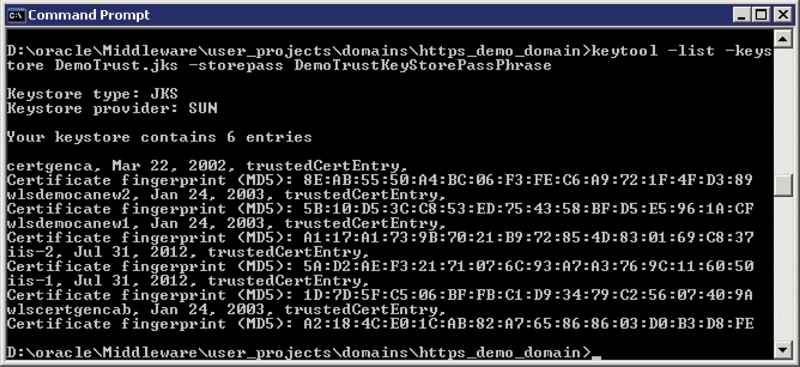
Figure 8: Output from keytool -list -keystore
Update the WebLogic Keystore Configuration
If you used an existing keystore rather than creating a new one, you can restart your WebLogic Server and skip the rest of this section. For those of us who created a new one because that is the instructions we found online…
Next, we need to tell WebLogic to use the JKS file (truststore.jks) we just created. Log in to the WebLogic Server Administration Console and navigate to Servers > AdminServer > Configuration > Keystores. Scroll down to “Custom Trust Keystore:” and change the value to “truststore.jks” and the value of “Custom Trust Keystore Passphrase:” and “Confirm Custom Trust Keystore Passphrase:” to the password you used when earlier, then save your changes. You will get a nice message similar to the following:
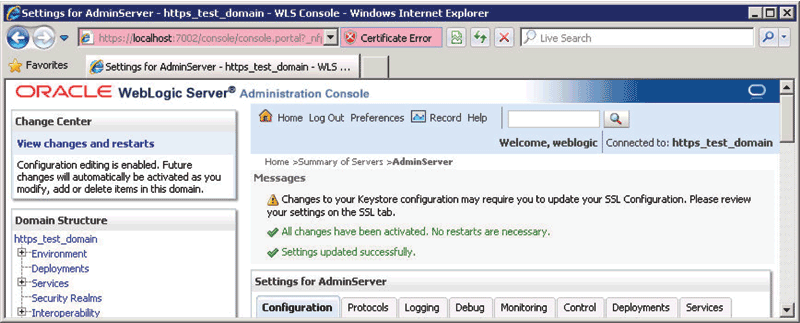
Figure 9: To Be Safe, Restart Anyways
The “No restarts are necessary” is somewhat of an exaggeration. If you want to be able to use the keystore you may need restart the server(s). To save myself aggravation, I always do. Your mileage may vary.
Conclusion
That should get you there. If there are some erroneous steps included for your situation in particular, I will offer up a semi-apology as the process described above does not take long at all and if there is one step that could be dropped from it, is still much faster than trying to figure this out from other sources.
© Scott S. Nelson